SNMP modifications in version 4.1
In version 4.1, some changes have been made regarding SNMP.
Activate SNMP
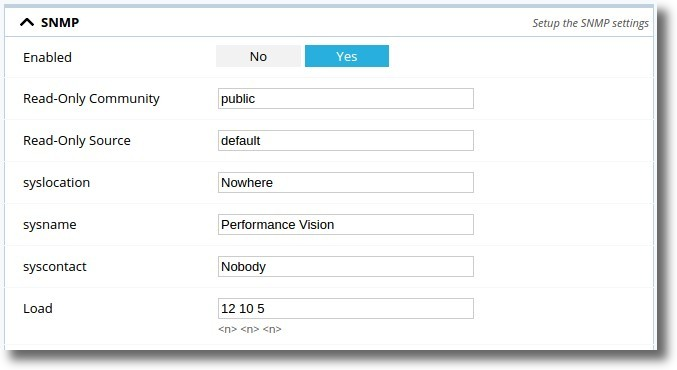
By default, the SNMP stack is no longer automatically started on SkyLIGHT PVX probes. To activate it, use the Graphical User Interface:
Configuration > Settings > Nodes Management

SNMP Configuration by GUI.
Set SNMP Enabled to Yes and apply configuration
You’ll then be able to request system linux SNMP or SkyLIGHT PVX OIDs. Contrary to pre-4.1 versions, the entire SNMP stack is started when enabled.
Note
When migrating from prior versions with SNMP activated, the setting will be kept. In others words, you won’t have to start it again.
The Accedian MIB
- The Accedian MIB part has been updated:
- You’ll find the new MIB definitions available
here - Overall, the MIB has been cleaned of useless items, and the Business Critical Network / Application parts have been fixed and updated.
- Note that obsoleted fields have been kept for compatibility reasons.
- You’ll find the new MIB definitions available
BCA/BCN SNMP requesting
From this release onwards, BCA and BCN requests should be adapted as described below:
The result you get when requesting SNMP BCA/BCN is for the actual time - 10 min.
- Example:
SNMP request made at Aug 10 11:31:09 (1470821469 EPOCH format)
- Request result sample:
- BCA name = YourCriticalApp
- BCA data = EURT
- BCA TS = 1470820869 -> Aug 10 11:21:09
In other words, the BCA/BCN results you get are always 10 minutes old.
Note
You’ll find these informations described in the
MIB itself;
take a look at the bcaStateTable and bcnStateTable tables
for more details.
Accedian Nagios Plugin
The script has been entirely rewritten in Python for easier integration. It also outputs the metrics in a format compatible with Nagios®’ Performance Data. This let’s you easily graph the different BCA/BCN metrics.
The script can be found here. You’ll also need
to install the Accedian MIBS
and snmp tools.